 Arabic
 English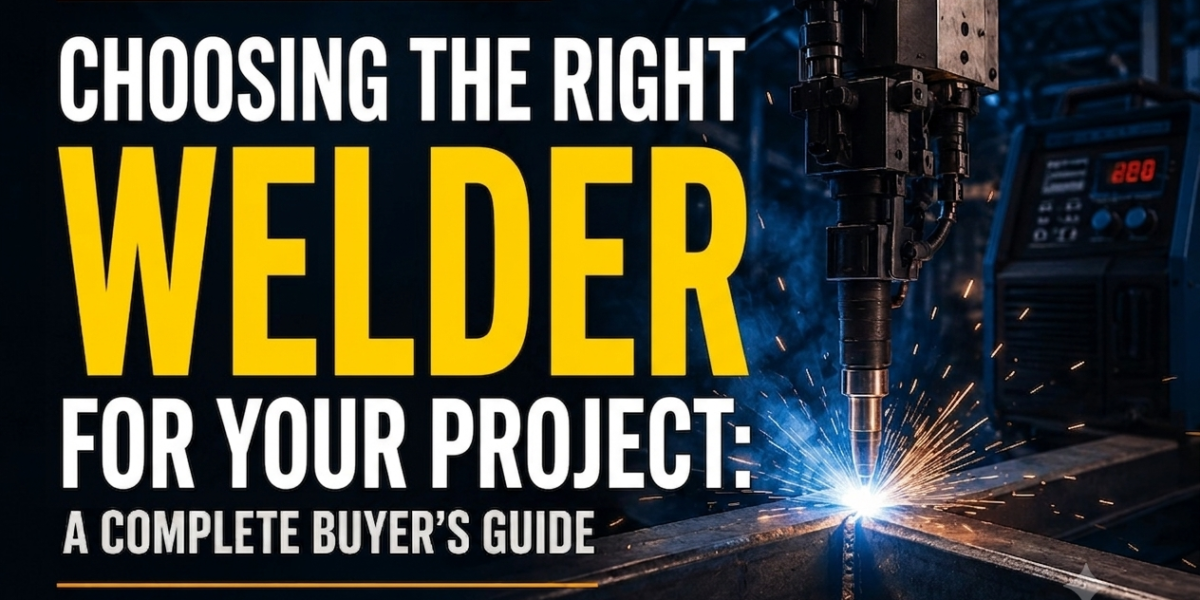
Choosing the Right Welder for Your Project: A Complete Buyer’s Guide
Walk into any welding supply showroom and you’ll be met with rows of machines—stick welders, MIG units, TIG rigs, plasma cutters, engine-driven generators—each promising to be the right fit for your work. For contractors, fabricators, maintenance teams, and workshop owners across Oman and the wider Gulf region, picking the wrong one doesn’t just waste money. It slows down projects, compromises weld quality, increases rework, and often means sending equipment back for something better suited to the job in the first place.
It’s tempting to treat welder selection as a simple matter of budget: buy the biggest, most powerful machine you can afford, and it’ll cover whatever comes up. In practice, this approach usually backfires in one of two ways.
First, oversized or overspecified machines are frequently harder to control at low output, which matters enormously when you’re working with thin sheet metal or delicate stainless fabrication. A machine built for heavy structural steel can be genuinely difficult to dial in for lighter work.
Second, and more commonly, underspecified machines simply can’t keep up. A welder that looks capable on paper but has a low duty cycle will force operators to stop and let the machine cool every few minutes during sustained production runs—quietly eating into labor hours and project timelines.
The right welder isn’t the most powerful one, or the cheapest one. It’s the one whose process, output range, duty cycle, and portability match the actual work in front of you. Getting this right up front saves money on the purchase, on operating costs, and on the hidden cost of lost productivity.
Step One: Understand the Core Welding Processes
Before comparing brands or models, it helps to have a clear picture of the main welding processes, since this decision drives almost everything else.
Stick Welding (SMAW – Shielded Metal Arc Welding)
Stick welding remains one of the most widely used processes in construction, structural steel work, pipeline fabrication, and general repair. It uses a flux-coated electrode that both creates the arc and shields the weld pool from contamination.
Strengths:
- Works well outdoors, even in wind, since it doesn’t rely on a separate shielding gas
- Tolerant of rust, mill scale, and less-than-perfect surface preparation
- Machines tend to be simple, rugged, and relatively inexpensive
- Well suited to thicker materials and structural work
Limitations:
- Slower than MIG for high-volume production work
- Produces slag that needs to be chipped away between passes
- Less forgiving for thin sheet metal
- Requires more operator skill to produce clean, consistent beads
Stick welding is often the default choice for site work, maintenance welding, and structural fabrication where speed matters less than reliability under rough conditions.
MIG Welding (GMAW – Gas Metal Arc Welding)
MIG welding feeds a continuous wire electrode through a gun, shielded by an externally supplied gas. It’s the process most associated with speed and ease of use.
Strengths:
- Fast, with minimal cleanup between passes
- Easier to learn than stick or TIG, which matters for training new operators
- Well suited to production environments and long weld runs
- Produces clean, consistent beads on mild steel
Limitations:
- Requires shielding gas, which limits use in windy outdoor conditions unless properly shielded
- Generally needs cleaner base metal than stick welding
- Equipment and consumables (gas, wire) add ongoing operating cost
- Less ideal for very thick material without multiple passes
MIG is frequently the choice for fabrication shops, automotive work, and any high-volume production environment where welding speed directly affects output.
TIG Welding (GTAW – Gas Tungsten Arc Welding)
TIG welding uses a non-consumable tungsten electrode and, typically, a separate filler rod, with a shielding gas (usually argon) protecting the weld pool. It’s the slowest of the three main processes but offers by far the greatest control.
Strengths:
- Produces the cleanest, most precise welds of any common process
- The only practical choice for many aluminum and stainless steel applications
- Excellent for thin materials, where burn-through is a risk with other processes
- Ideal where weld appearance matters—visible seams, food-grade equipment, decorative metalwork
Limitations:
- Slower and more labor-intensive than MIG or stick
- Requires significantly more operator skill
- Higher equipment cost relative to output
- Less practical for thick structural sections or high-volume work
TIG earns its place in precision fabrication, piping systems requiring high-integrity welds, aerospace-adjacent work, and stainless or aluminum jobs where a rough weld simply isn’t acceptable.
Multi-Process and Engine-Driven Machines
Many modern inverter-based welders combine two or three of these processes in a single unit, letting an operator switch between stick, MIG, and TIG depending on the task. For shops or contractors whose work varies week to week, this flexibility can be worth more than the marginal performance gain of a dedicated single-process machine.
Separately, engine-driven welder/generators—built around diesel or petrol engines—combine welding output with generator power output. These exist specifically for site work where grid power isn’t available: pipeline construction, remote structural projects, oilfield-adjacent fabrication, and emergency repair work far from a shop.
Step Two: Match the Machine to the Metal
The material you’re working with narrows the process—and therefore the machine—faster than any other factor.
Mild and carbon steel: The most forgiving material to weld. Stick and MIG both handle it well; the choice mostly comes down to speed requirements and site conditions rather than the metal itself.
Stainless steel: More sensitive to heat input and contamination than mild steel. TIG is generally preferred for visible or high-integrity joints, though MIG with the correct wire and gas mixture is common in production environments where speed matters more than a mirror finish.
Aluminum: Aluminum’s high thermal conductivity and low melting point make it unforgiving of the wrong process. TIG welding, or MIG with a spool gun and the correct wire feed setup, are the standard approaches. Stick welding aluminum is uncommon and generally not recommended.
Mixed or unpredictable materials: If your work regularly shifts between steel, stainless, and aluminum—which is common in general fabrication shops and maintenance departments—a multi-process inverter machine avoids the cost and clutter of owning several dedicated units.
Step Three: Consider the Work Environment
Where the welding happens is just as important as what’s being welded.
Workshop and Fabrication Shop Settings
A fixed workshop with reliable single- or three-phase power gives you the most flexibility. Standard mains-powered inverter welders, MIG setups with dedicated gas supply, and TIG stations all work well here, since portability and self-contained power aren’t concerns.
Shops running long production shifts should pay particular attention to duty cycle (covered in detail below) and consider whether a higher-output machine will pay for itself in reduced downtime.
Site and Remote Work
Construction sites, pipeline routes, and remote maintenance jobs present a different set of constraints:
- Power availability is often limited or nonexistent, making engine-driven welder/generators the practical choice.
- Weather exposure favors stick welding, since MIG and TIG shielding gas can be disrupted by wind.
- Portability matters—compact inverter machines have made this far less of a compromise than older transformer-based welders, but weight and case design still vary significantly between models.
Pipeline and Pressure Vessel Fabrication
Pipe welding carries its own demands: code-compliant weld procedures, consistent penetration on circumferential joints, and often certification requirements tied to the specific process and equipment used. Purpose-built pipe welding systems—designed around root, fill, and cap passes on pipe joints—are usually a better investment than adapting general-purpose machines, particularly for contractors doing this work regularly.
Automated and Robotic Applications
Higher-volume manufacturing and fabrication operations increasingly use automated or robotic welding systems to improve consistency and throughput on repetitive joints. This is a significant step up in both cost and complexity from manual welding equipment, and is generally only worth considering once production volume and joint repeatability justify the investment.
Step Four: Understand Duty Cycle—The Number Everyone Overlooks
A welder’s amperage rating tells you its maximum output, but duty cycle tells you how long it can sustain that output before needing to cool down. It’s expressed as a percentage of a 10-minute period.
For example, a welder rated at “250A at 60% duty cycle” can run at 250 amps for 6 minutes out of every 10 before requiring a cooldown period. Push it harder or longer, and the machine will thermally shut down to protect itself.
Why this matters more than headline amperage:
Two machines can share the same maximum amperage rating and behave completely differently in real-world use if their duty cycles differ. A contractor doing occasional repairs might never notice a low duty cycle. A fabrication shop running long weld beads for hours at a time will hit that limit constantly if the machine isn’t rated for it—resulting in productivity losses that quietly cost far more than the price difference between machines would have.
Practical guidance:
- Occasional or light-duty repair work: A lower duty cycle machine is perfectly adequate and typically more affordable.
- Regular production welding: Look for a duty cycle rating that comfortably covers your typical working amperage, not just the machine’s maximum output.
- Heavy industrial or continuous operation: Prioritize duty cycle almost as highly as amperage itself when comparing machines.
Always check the duty cycle rating at the amperage you’ll actually be using most often, not just the machine’s peak spec, since ratings typically decrease as amperage increases.
Step Five: Power Source and Electrical Requirements
Before finalizing a purchase, confirm the electrical realities of where the machine will be used.
- Single-phase vs. three-phase: Many shops and most job sites only have single-phase power available. Some higher-output machines require three-phase input, which can be a dealbreaker if that infrastructure isn’t in place.
- Voltage compatibility: Confirm the machine matches local voltage standards and that any required transformers or adapters are accounted for.
- Generator compatibility: If you’re running a welder off a generator on site, check the manufacturer’s guidance on generator size and power quality, since inverter welders can be sensitive to unstable power.
- Amperage draw: Higher-output welders draw significant current, which may require dedicated circuits or panel upgrades in a workshop setting.
These are the kinds of details that are easy to overlook during a purchase decision but can turn into costly surprises during installation.
Step Six: Portability and Physical Considerations
Not every welder needs to move, but for those that do, physical characteristics matter:
- Weight: Modern inverter technology has dramatically reduced welder weight compared to older transformer-based machines, but there’s still real variation between models—some are genuinely one-person portable, others are not.
- Case and handle design: For machines that get carried up scaffolding, into confined spaces, or across rough terrain, a well-designed carrying case or wheeled cart can matter as much as raw weight.
- Environmental protection: Site machines should be rated or designed for dust, moisture, and temperature swings if they’re going to live outside a controlled workshop environment.
- Cable and torch length: Longer cable runs offer flexibility on larger job sites but can affect voltage drop and usability—confirm what’s included versus what needs to be purchased separately.
Step Seven: Factor in Support, Parts, and Long-Term Cost of Ownership
The purchase price of a welder is only the starting point. Over the life of the machine, several other cost factors matter just as much:
Consumables: Electrodes, MIG wire, tungsten, shielding gas, and contact tips are ongoing costs that vary by process and brand. Higher-volume operations should factor consumable cost into the total cost of ownership, not just the upfront machine price.
Availability of parts: A welder is only as reliable as the parts supply behind it. Before buying, it’s worth confirming that consumables, replacement torches, and wear parts are readily available locally, rather than requiring long international shipping lead times that stall a project.
Warranty coverage: Warranty length and terms vary significantly between brands and even between product lines from the same manufacturer. A longer warranty is a reasonable signal of manufacturer confidence in the machine’s build quality, and it materially reduces your risk on a significant equipment purchase.
Local service support: When something does need repair, proximity to a qualified service center can be the difference between a machine being down for a day versus weeks. This is particularly relevant for businesses that can’t afford extended equipment downtime.
Brand reputation and regional distribution: Established brands with strong distribution networks in your region tend to minimize the risk of being stuck with unsupported equipment. Lesser-known or grey-market imports may offer a lower upfront price but can carry meaningfully higher long-term risk if something goes wrong.
Step Eight: Match the Machine to Operator Skill Level
It’s worth being honest about who will actually be running the equipment.
- Experienced welders can extract strong results from a wider range of machines, including ones that demand more manual control, like stick or TIG welding.
- Newer or less experienced operators often produce more consistent results, faster, on MIG equipment, which is generally considered the easiest process to learn.
- Mixed-skill teams may benefit from machines with simplified control panels, preset programs, or synergic MIG settings that automatically adjust parameters based on wire size and material thickness, reducing the margin for operator error.
Investing in a machine that’s slightly easier to operate correctly can pay for itself quickly in reduced rework and scrap, particularly on teams with varying experience levels.
Common Mistakes to Avoid
A few patterns show up repeatedly in welder purchasing decisions that are worth flagging directly:
Buying based on amperage alone. As covered above, duty cycle, process type, and portability often matter more than the headline amperage number.
Ignoring the power supply at the point of use. A machine that requires three-phase power is a poor fit for a site with only single-phase access, regardless of how well it matches every other requirement.
Underestimating consumable and operating costs. A cheaper machine with expensive or hard-to-source consumables can end up costing more over time than a pricier unit with cheap, widely available parts.
Choosing a single-process machine for multi-material work. Teams that regularly move between steel, stainless, and aluminum often find that a multi-process inverter pays for itself compared to owning and maintaining several dedicated machines.
Overlooking local support. A great machine with no local parts or service backup can become a liability the first time something breaks mid-project.
A Practical Decision Checklist
Before making a final decision, run through these questions:
- What material(s) will you be welding most often—mild steel, stainless, aluminum, or a mix?
- What process best suits that material and your quality requirements—stick, MIG, TIG, or multi-process?
- Where will the machine be used—fixed workshop, mobile site work, or both?
- What amperage and duty cycle does your typical workload actually demand, not just the maximum you might occasionally need?
- What power source is available where the machine will be used—single-phase, three-phase, or engine-driven/generator power?
- How portable does it need to be, and what physical conditions will it face?
- Who will operate it, and does the machine’s control complexity match their skill level?
- What’s the total cost of ownership—consumables, parts availability, warranty terms, and access to local service?
Answering these honestly, in order, will typically narrow a wide field of options down to a short, sensible shortlist—well before you need to start comparing specific model numbers or brands.
Final Thoughts
There’s no single “best” welder on the market—only the best welder for the specific work in front of you. A compact TIG unit built for precision stainless fabrication is the wrong tool for pipeline construction in a remote location, just as a rugged engine-driven welder/generator is overkill for detailed aluminum work in a controlled shop environment.
The strongest purchasing decisions start with the work itself: the material, the environment, the required output and duty cycle, and the realities of power supply and portability. From there, the choice of process—and eventually, brand and model—follows logically rather than being guessed at.
Finally, don’t underestimate the value of the relationship behind the purchase. A supplier who carries a genuinely broad range of processes, brands, and machine classes—and who can speak knowledgeably about which one actually fits your application—is worth more over the life of the equipment than the machine itself. Parts availability, warranty support, and access to a local service center often end up mattering more than the exact spec sheet once the welder is a year or two into daily use.
Take the time to define the job clearly before you shop for the machine. It’s the single highest-leverage decision in the entire buying process.
 Categories
 Search
 Top
Top